
In addition to the new AutoML features with OML4Py (Oracle Machine Learning for Python), which is currently available on ADW/ATP using Oracle Machine Learning (OML) Notebooks, Oracle has just released a GUI for AutoML.
As with all new releases there are a few things that Oracle need to tidy up with the interface and CX with this GUI. I’m sure these will be corrected/updated quietly behind the scenes and we will gradually see these improvements over the weeks to come (after product release). Part of the joys of cloud first deployment.
The initial release of AutoML GUI is SO SLOW. It is several, several times slower than trying to do the same task in OML4Py. Plus the Algorithms used and models created seem to be different. Maybe this is down to the “meta-learning” AutoML uses, but for repeatability and ensuring confidence with of outputs, some additional work is needed otherwise it is unreliable and people won’t use something that is unreliable.
To illustrate how to use the AutoML GUI, I’m going to use the same example and same Oracle Cloud environment I’ve used to illustrate the other ways of running AutoML using OML4Py (see post 1, see post 2).
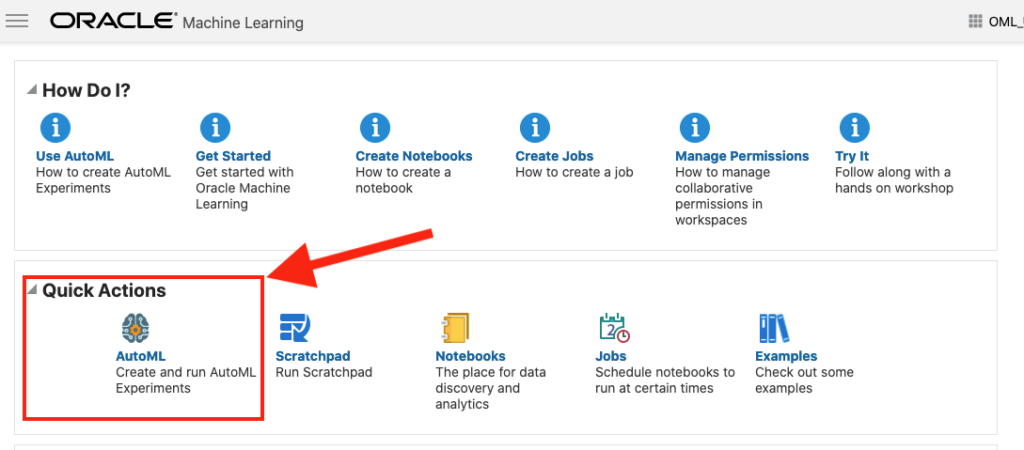
The AutoML GUI can be accessed from the main OML Notebooks welcome page. On the next webpage, called AutoML Experiment, click on the Create button.
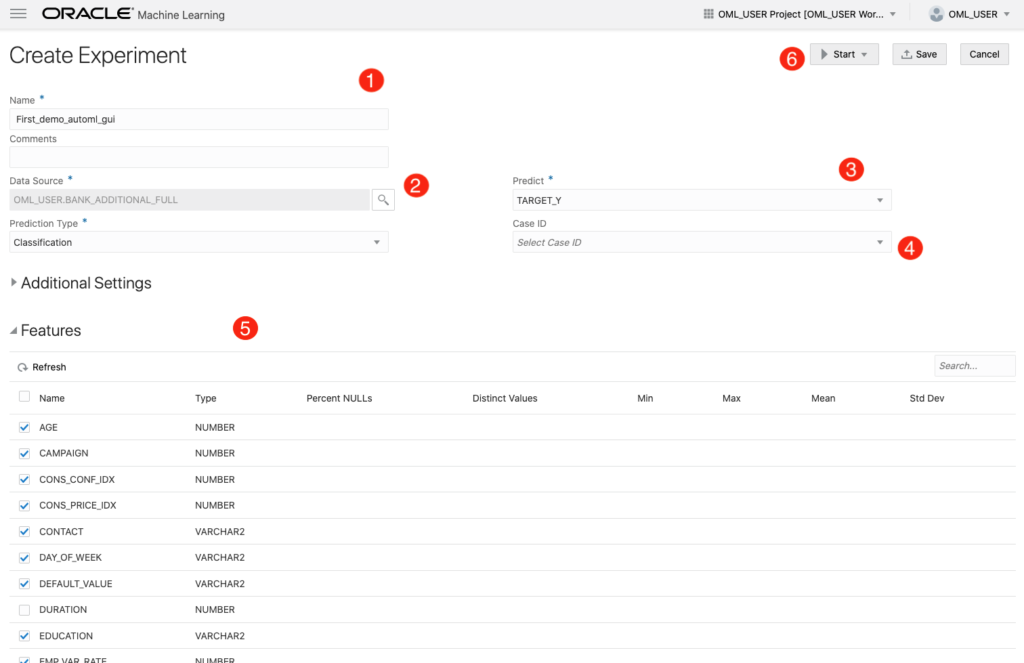
The Create Experiment page allows you to specify the required details for you AutoML experiment. Although this tool is aims at non-technical people, they still require a certain degree of knowledge of Machine Learning and what the different terms mean! On the Create Experiment page enter the following details, and enter them in this order. Numbers below correspond to numbers on image below
Name of experiment – free format text – enter a meaningful name
Data Source – Click on Magnifying Glass – Select your Schema, and Table/View from the list
Predict – what attribute is the Target variable/column
Case ID – Select attribute that is unique e.g. PK, or some other attribute. Selecting an attribute for this is not necessary
Features – Exclude any attributes you don’t want included, for example attributes that are correlated to the target values
You can now run the AutoML process by clicking the Start button at the top of the page (6).
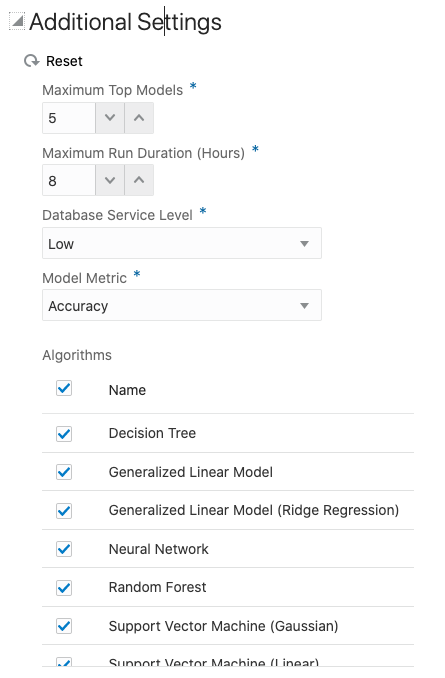
But maybe before you do this, you can look at the Additional Settings, and alter these if you want or just leave them as they are.
After clicking the Start button, you are given two options or modes. You can run the AutoML Experiment with “Faster Results” or with “Better Accuracy”. Both of these are SLOW to execute, but I’d advice running using Both options/modes to see how the results differ. This does require you to setup two version of the same AutoML Experiment!
When the AutoML Experiment is running, see image below, the dashboard displays results are each part of the experiment completes. These include the Algorithms, the accuracy levels and the Features/Attributes that are important.
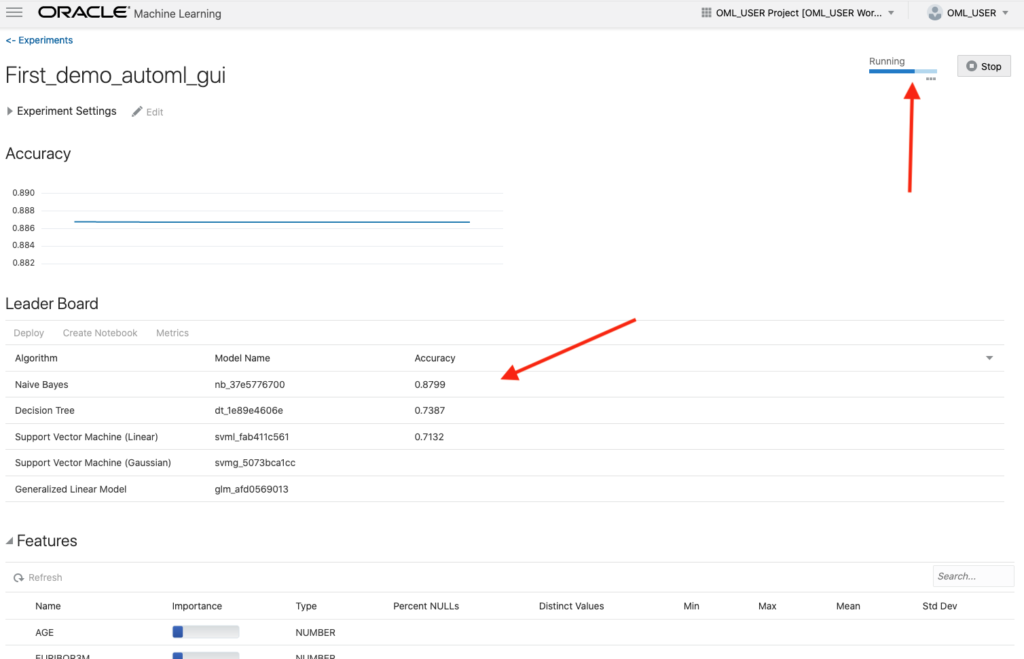
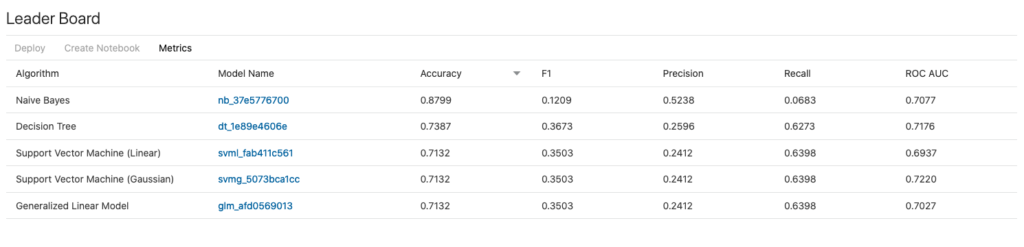
The AutoML Experiment will eventually finish! Even after displaying the details of the last algorithm in the Leaders Board, it will keep running for some time before completing. Initially the dashboard will just display Accuracy for the model. You can expand this list of evaluation metrics by clicking the ‘Metrics’ located just under the Leader Board title, and selecting the additional evaluation metrics from the list. These will now be displayed on the Leaders Board.
That’s it! Relatively simple to use, but you do still know what you are doing, and it isn’t really aimed at novices despite some of the marketing.
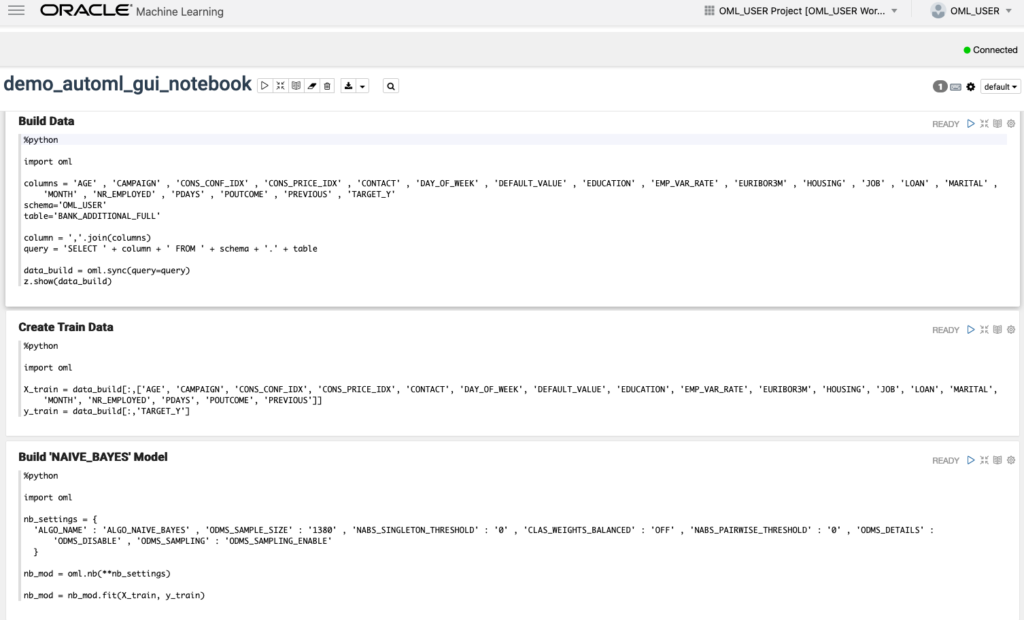
One final feature that is kind of nice is the ‘Create Notebook’. Located in Leader Board section, select one of the models, and then click on ‘Create Notebook’ and it will create an OML Notebook for you based on the model you have selected. You will be promoted to give the notebook a name. A message will be displayed at the top of the webpage saying ‘…notebook successfully created’. Go to your list of Notebooks and open it. It will be a basic notebook with code to create/define the data set, setup model settings, create the model, display model details and use the model to label a data set.
AutoML is just too slow at the moment (I’ve tested with several data sets of different sizes). Start the process and go for lunch. It might be finished when you get back! I’ve been told things would run a lot quicker if I wasn’t using the Free Tier. I hope that is true, but how many people have easy access to such an environment to test this? Not many, including myself, which makes it difficult to test and compare the results. The Free Tier is the gateway for people get to try new Oracle products. First impression are important.
I mentioned earlier I used the same data set and Oracle Cloud environment when I showed how to use AutoML in OML4Py (using OML Notebooks). The results from OML4Py AutoML are different to those show above using AutoML (G)UI. Getting different results with similar setttings/configurations is very confusing. Which approach should be used for AutoML? Can you trust the results from AutoML if you are getting different results? If the data scientist uses OML4Py and the data analyst uses the AutoML GUI, then there should be some commonality in what is produced by these same/similar AutoML. Realiability and reproducibility is vital in Data Science, Machine Learning, etc.
In my tests, there was no similarity/commonality with the outputs from AutoML, that was my experience. In such a situation where different AutoML outputs are produced which one should we believe/trust? Who will the business users believe? Who is doing it correctly? Who is producing results the business can rely upon?
